Step 1: Open Google Calendar
Go to your web browser (like Chrome, Firefox, Safari, etc.) and navigate to: calendar.google.com.
Make sure you are logged into your Google account.
Step 2: Start Creating an Appointment Schedule
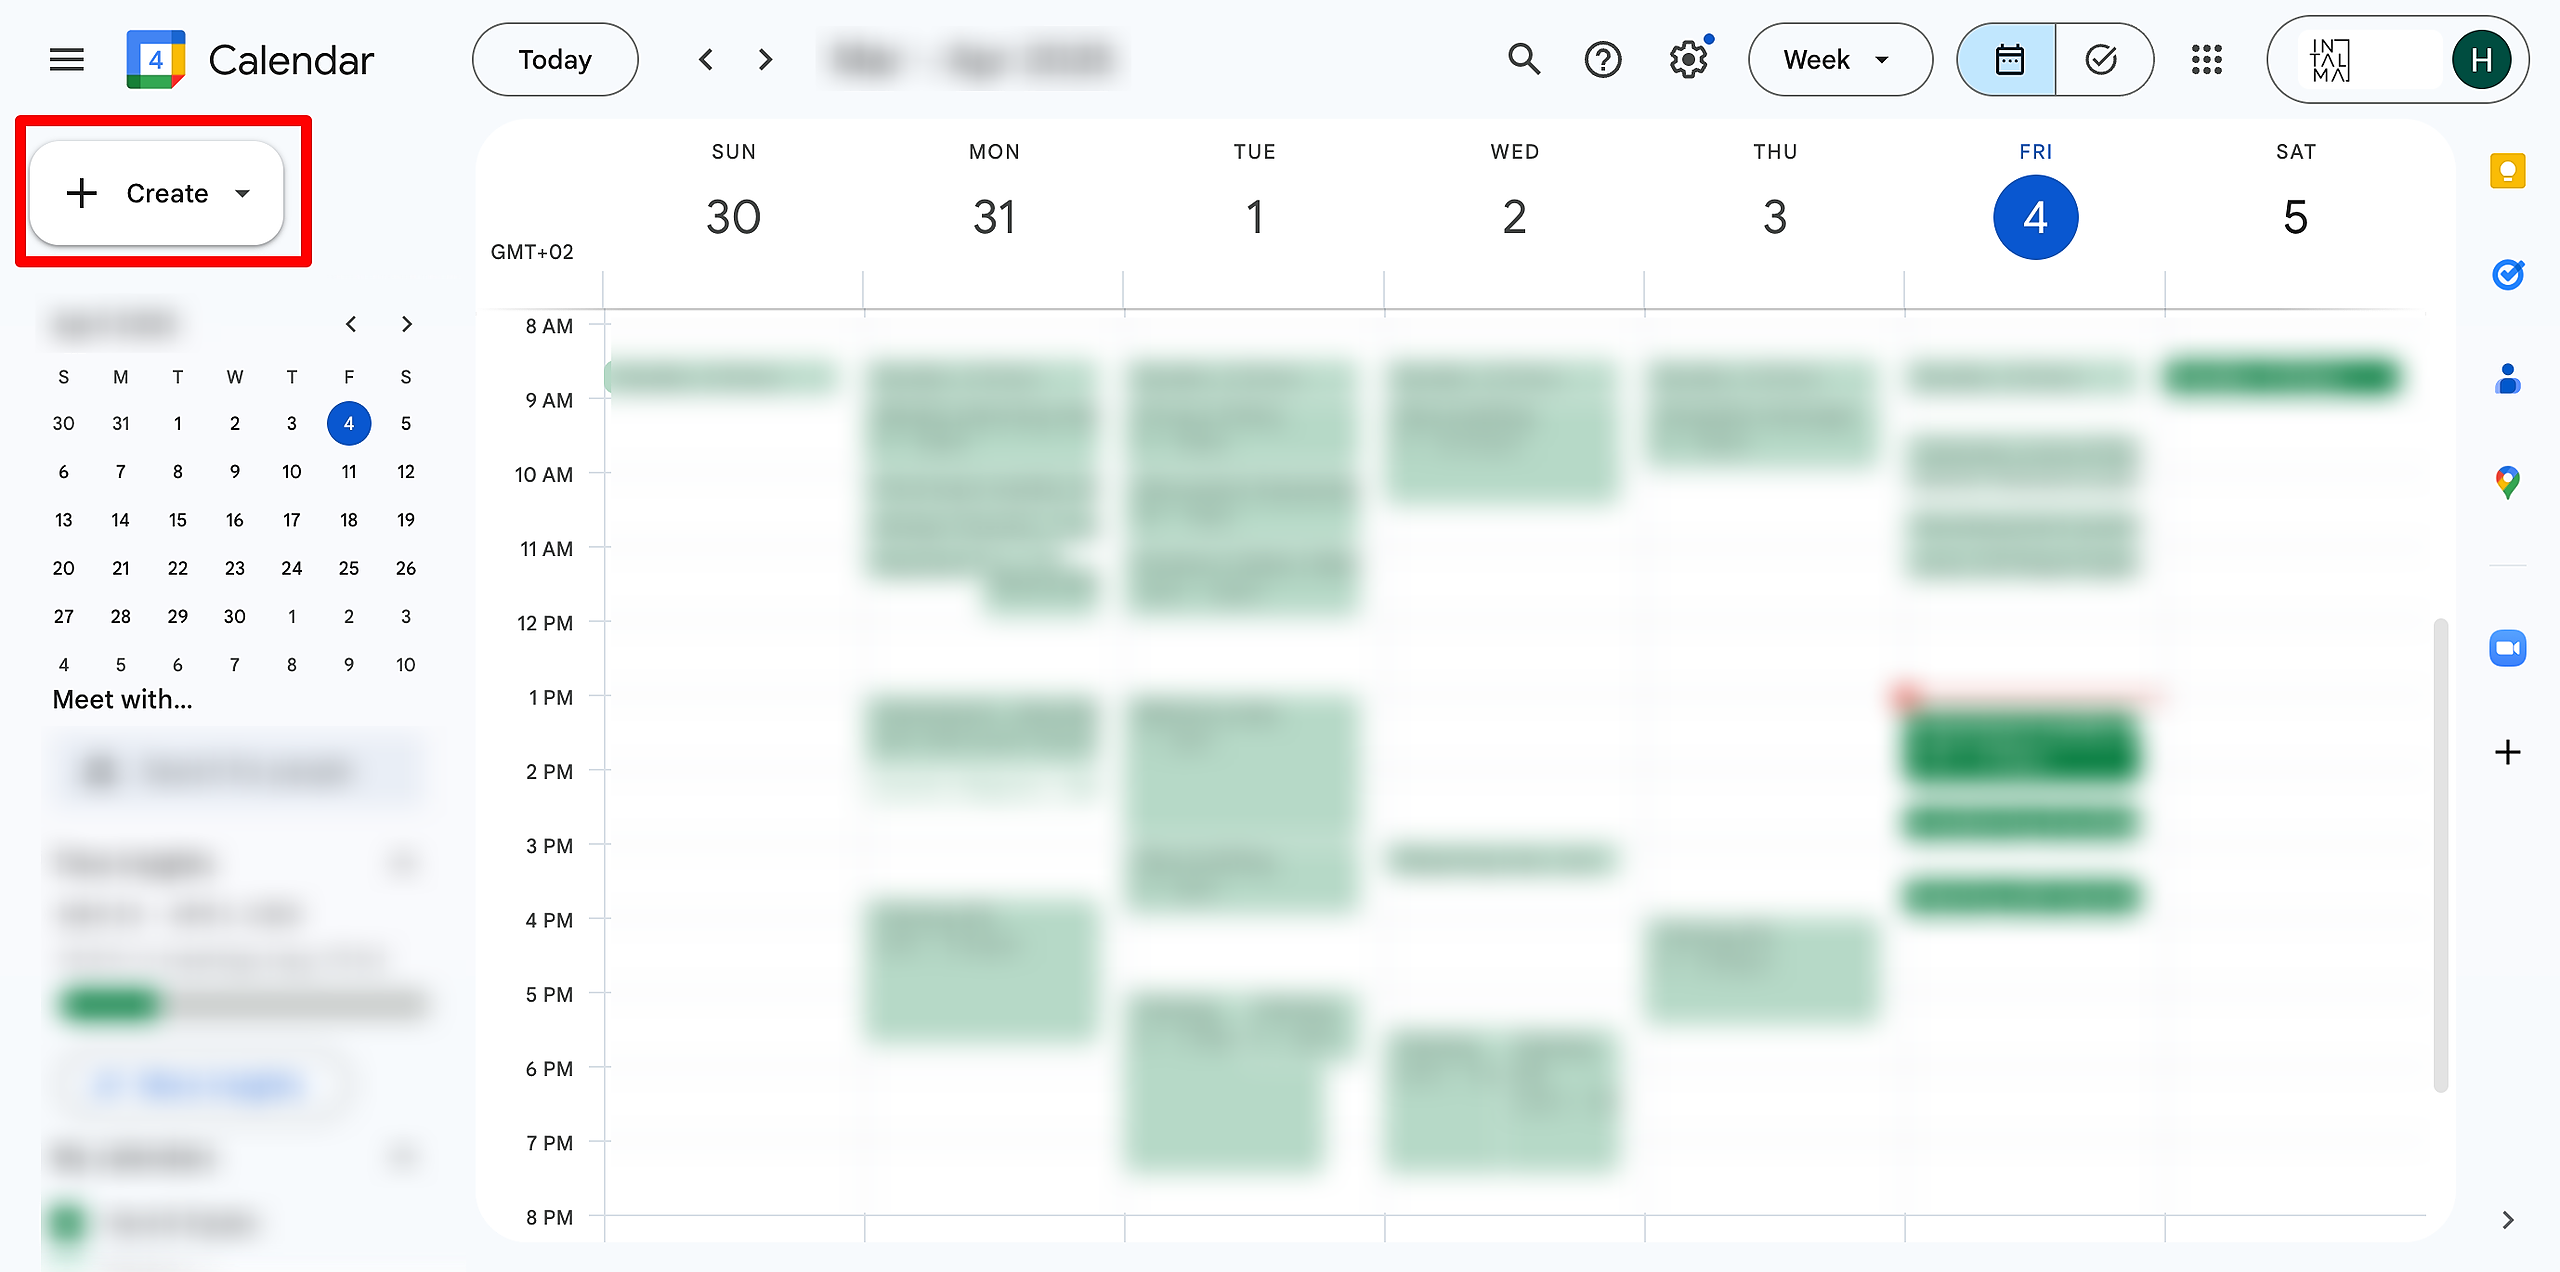
In the top left corner, click the "+" (Create) button.
In the dropdown menu that appears, click on
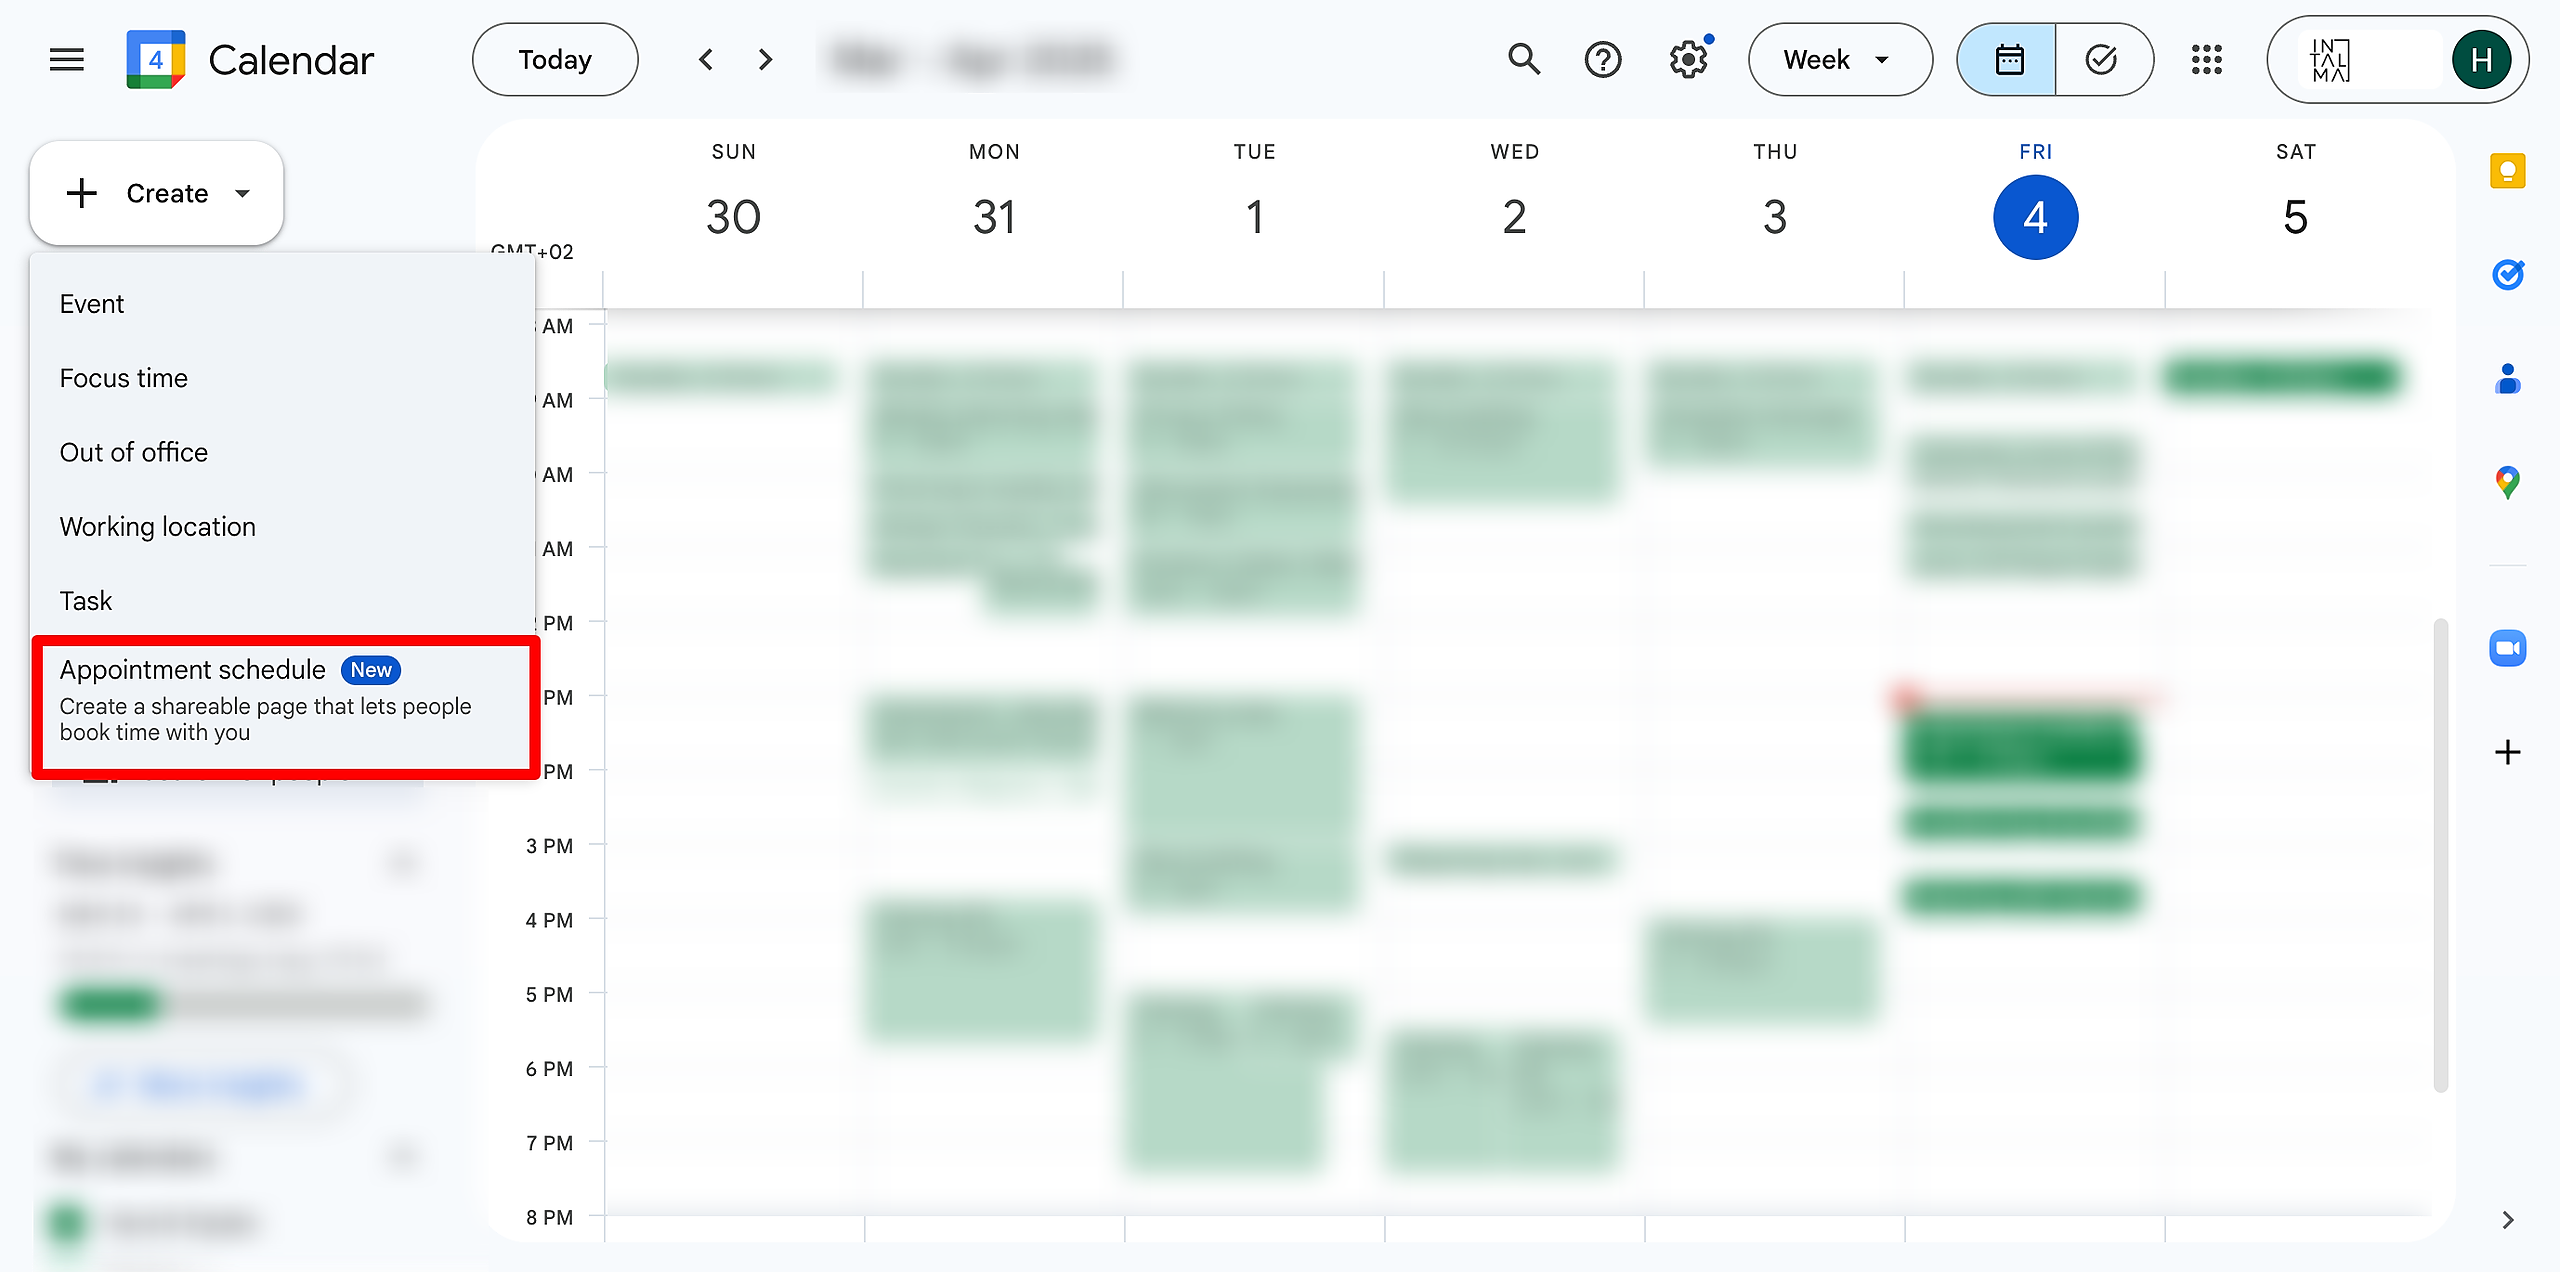
If you don't see "Appointment schedule," it means your Google account might not have access to this feature. This feature is generally available for Google Workspace subscribers and Google One Premium members. If you don't see it, you might need to consider upgrading your account or using a different scheduling tool.
Step 3: Configure Your Appointment Schedule Details
A new window will appear where you can configure your appointment schedule.
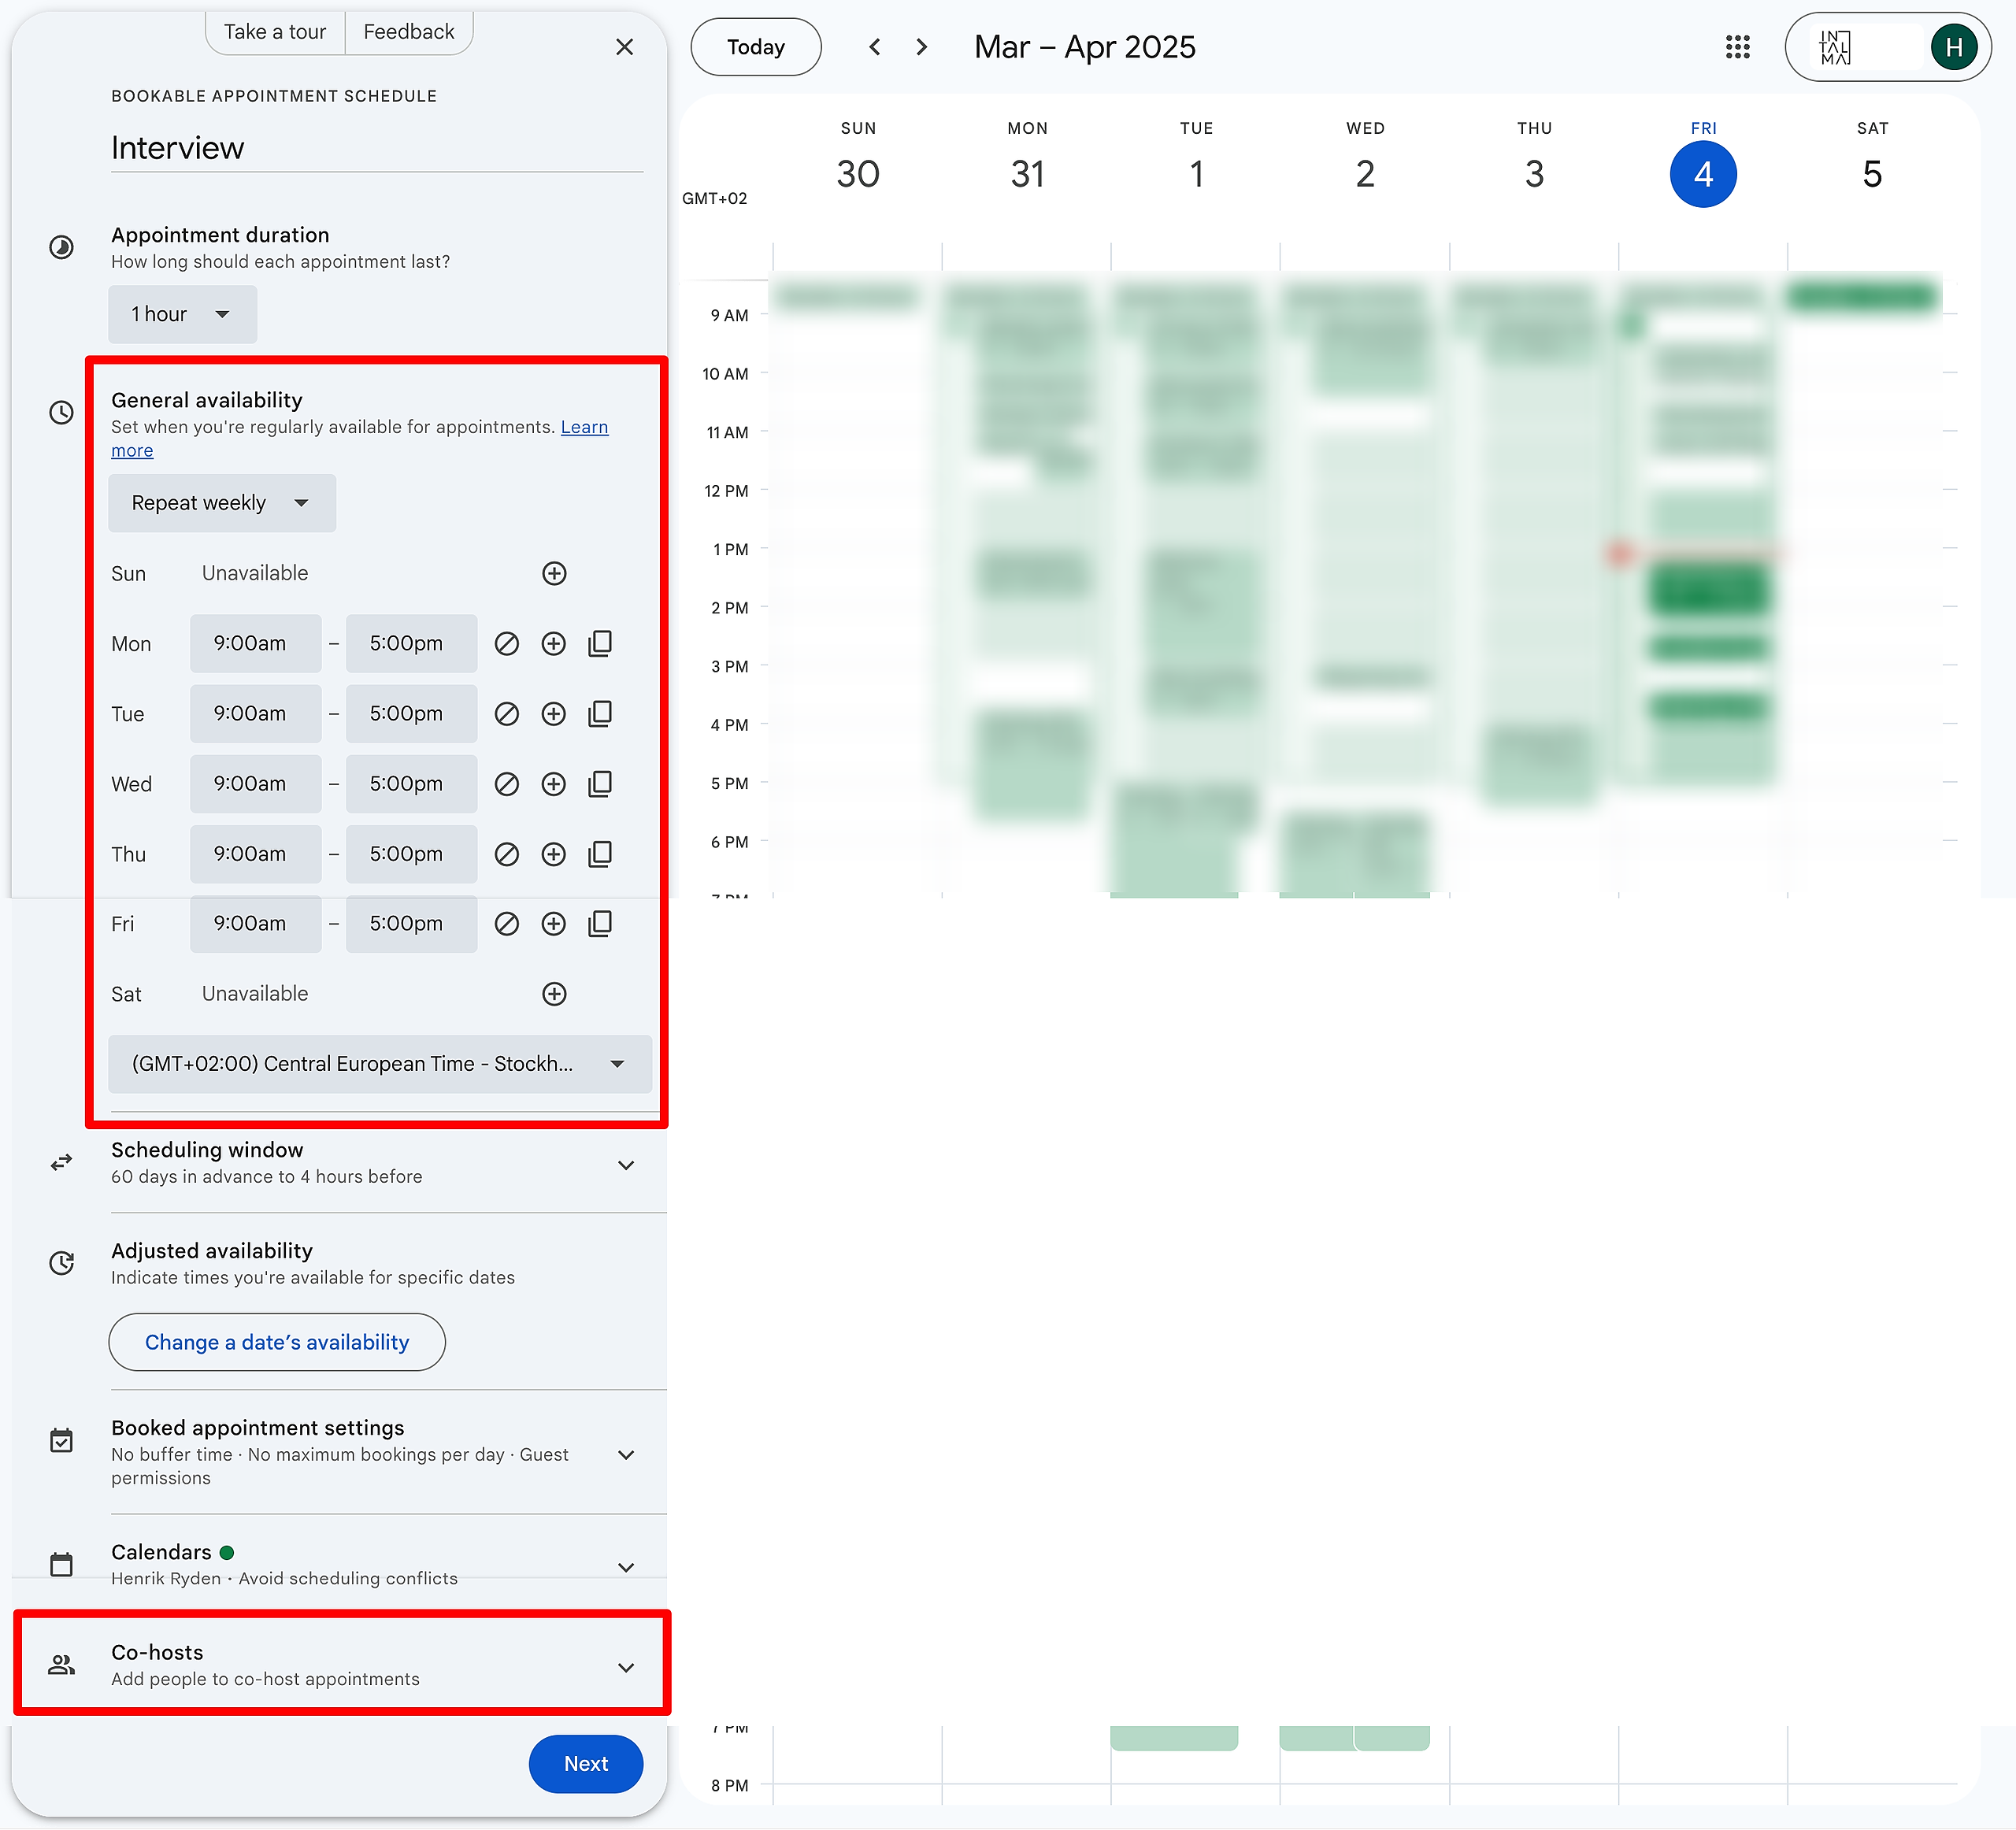
Appointment title: Enter a clear and descriptive title for your appointment schedule (e.g., "Interview for the position of [Position,"
Appointment duration: Choose the length of each appointment/interview slot from the dropdown menu (e.g., 30 minutes, 1 hour).
Availability: Set the days and times you are available for these appointments.
Click on the days of the week you want to offer appointments.
For each selected day, specify the start and end times of your availability.
You can add multiple availability slots for the same day if needed (click the "+" icon next to the time).
Location and conferencing: Choose how the appointment will take place.
You can select "Google Meet video conferencing" to automatically create a unique Meet link for each booking.
You can choose "In person" and enter a location.
You can also select "Phone call" or "None/Other" and provide instructions in the confirmation email.
Time zone: Verify your time zone is correct.
Buffer time: Add time before or after appointments to prepare or take a break.
Minimum lead time: Set how far in advance someone can book an appointment.
Maximum booking window: Set how far into the future someone can book an appointment.
Automatically decline conflicting events: This is usually checked by default and is recommended.
Form questions (Optional): Click on "Form questions" to customize the information you collect from people booking with you (e.g., name, email, purpose of the meeting). You can add additional questions by clicking "+ Add item."
Panel members: You can also add Co-hosts if it is a panel interview
Step 4: Save Your Appointment Schedule
Once you have configured all the desired settings, click the "Save" button at the bottom of the window.(Screenshot Suggestion: A screenshot of the "Appointment schedule" setup window with the "Save" button highlighted at the bottom.)
Step 5: Get the Shareable Booking Link
After saving, your appointment schedule will be listed in the left-hand sidebar of your Google Calendar under the section called "Appointment schedules."(Screenshot Suggestion: A screenshot of the left-hand sidebar of Google Calendar with the "Appointment schedules" section highlighted and your newly created schedule listed.)
Hover your mouse over the name of your appointment schedule in the sidebar. You will see three vertical dots (Options) appear. Click on these three dots.(Screenshot Suggestion: A close-up screenshot of the "Appointment schedules" section in the sidebar with the three vertical dots (Options) next to your schedule highlighted.)
In the dropdown menu that appears, click on "Open booking page."(Screenshot Suggestion: A screenshot of the dropdown menu that appears after clicking the three vertical dots, with "Open booking page" highlighted.)
A new tab will open in your browser displaying your appointment booking page. This is the page you will share with others.(Screenshot Suggestion: A screenshot of the actual appointment booking page as it appears to someone you share the link with. It should show your availability and the booking options.)
Copy the URL (web address) from the address bar of this new tab. This is your shareable booking link.(Screenshot Suggestion: A screenshot of the browser's address bar with the URL of the booking page highlighted.)
Step 6: Share Your Booking Link
You can now share this link with your customers through email, your website, social media, or any other platform you use to communicate.

By following these steps, your customers will be able to easily view your availability and book appointments with you through your Google Calendar appointment schedule. Remember to keep your availability updated in your Google Calendar to ensure accurate booking options for your customers.